Installation
After Getting all the hardware now its time to flash the os to Raspberry Pi 3B and installing some Python libraries.To start Raspberry PI for first time we need Ethernet Cable and Wifi or hostspot network to which laptop should be connected.Also We use Windows initially for these setup.Then will move to Ubuntu 16.04 for connecting to PI.
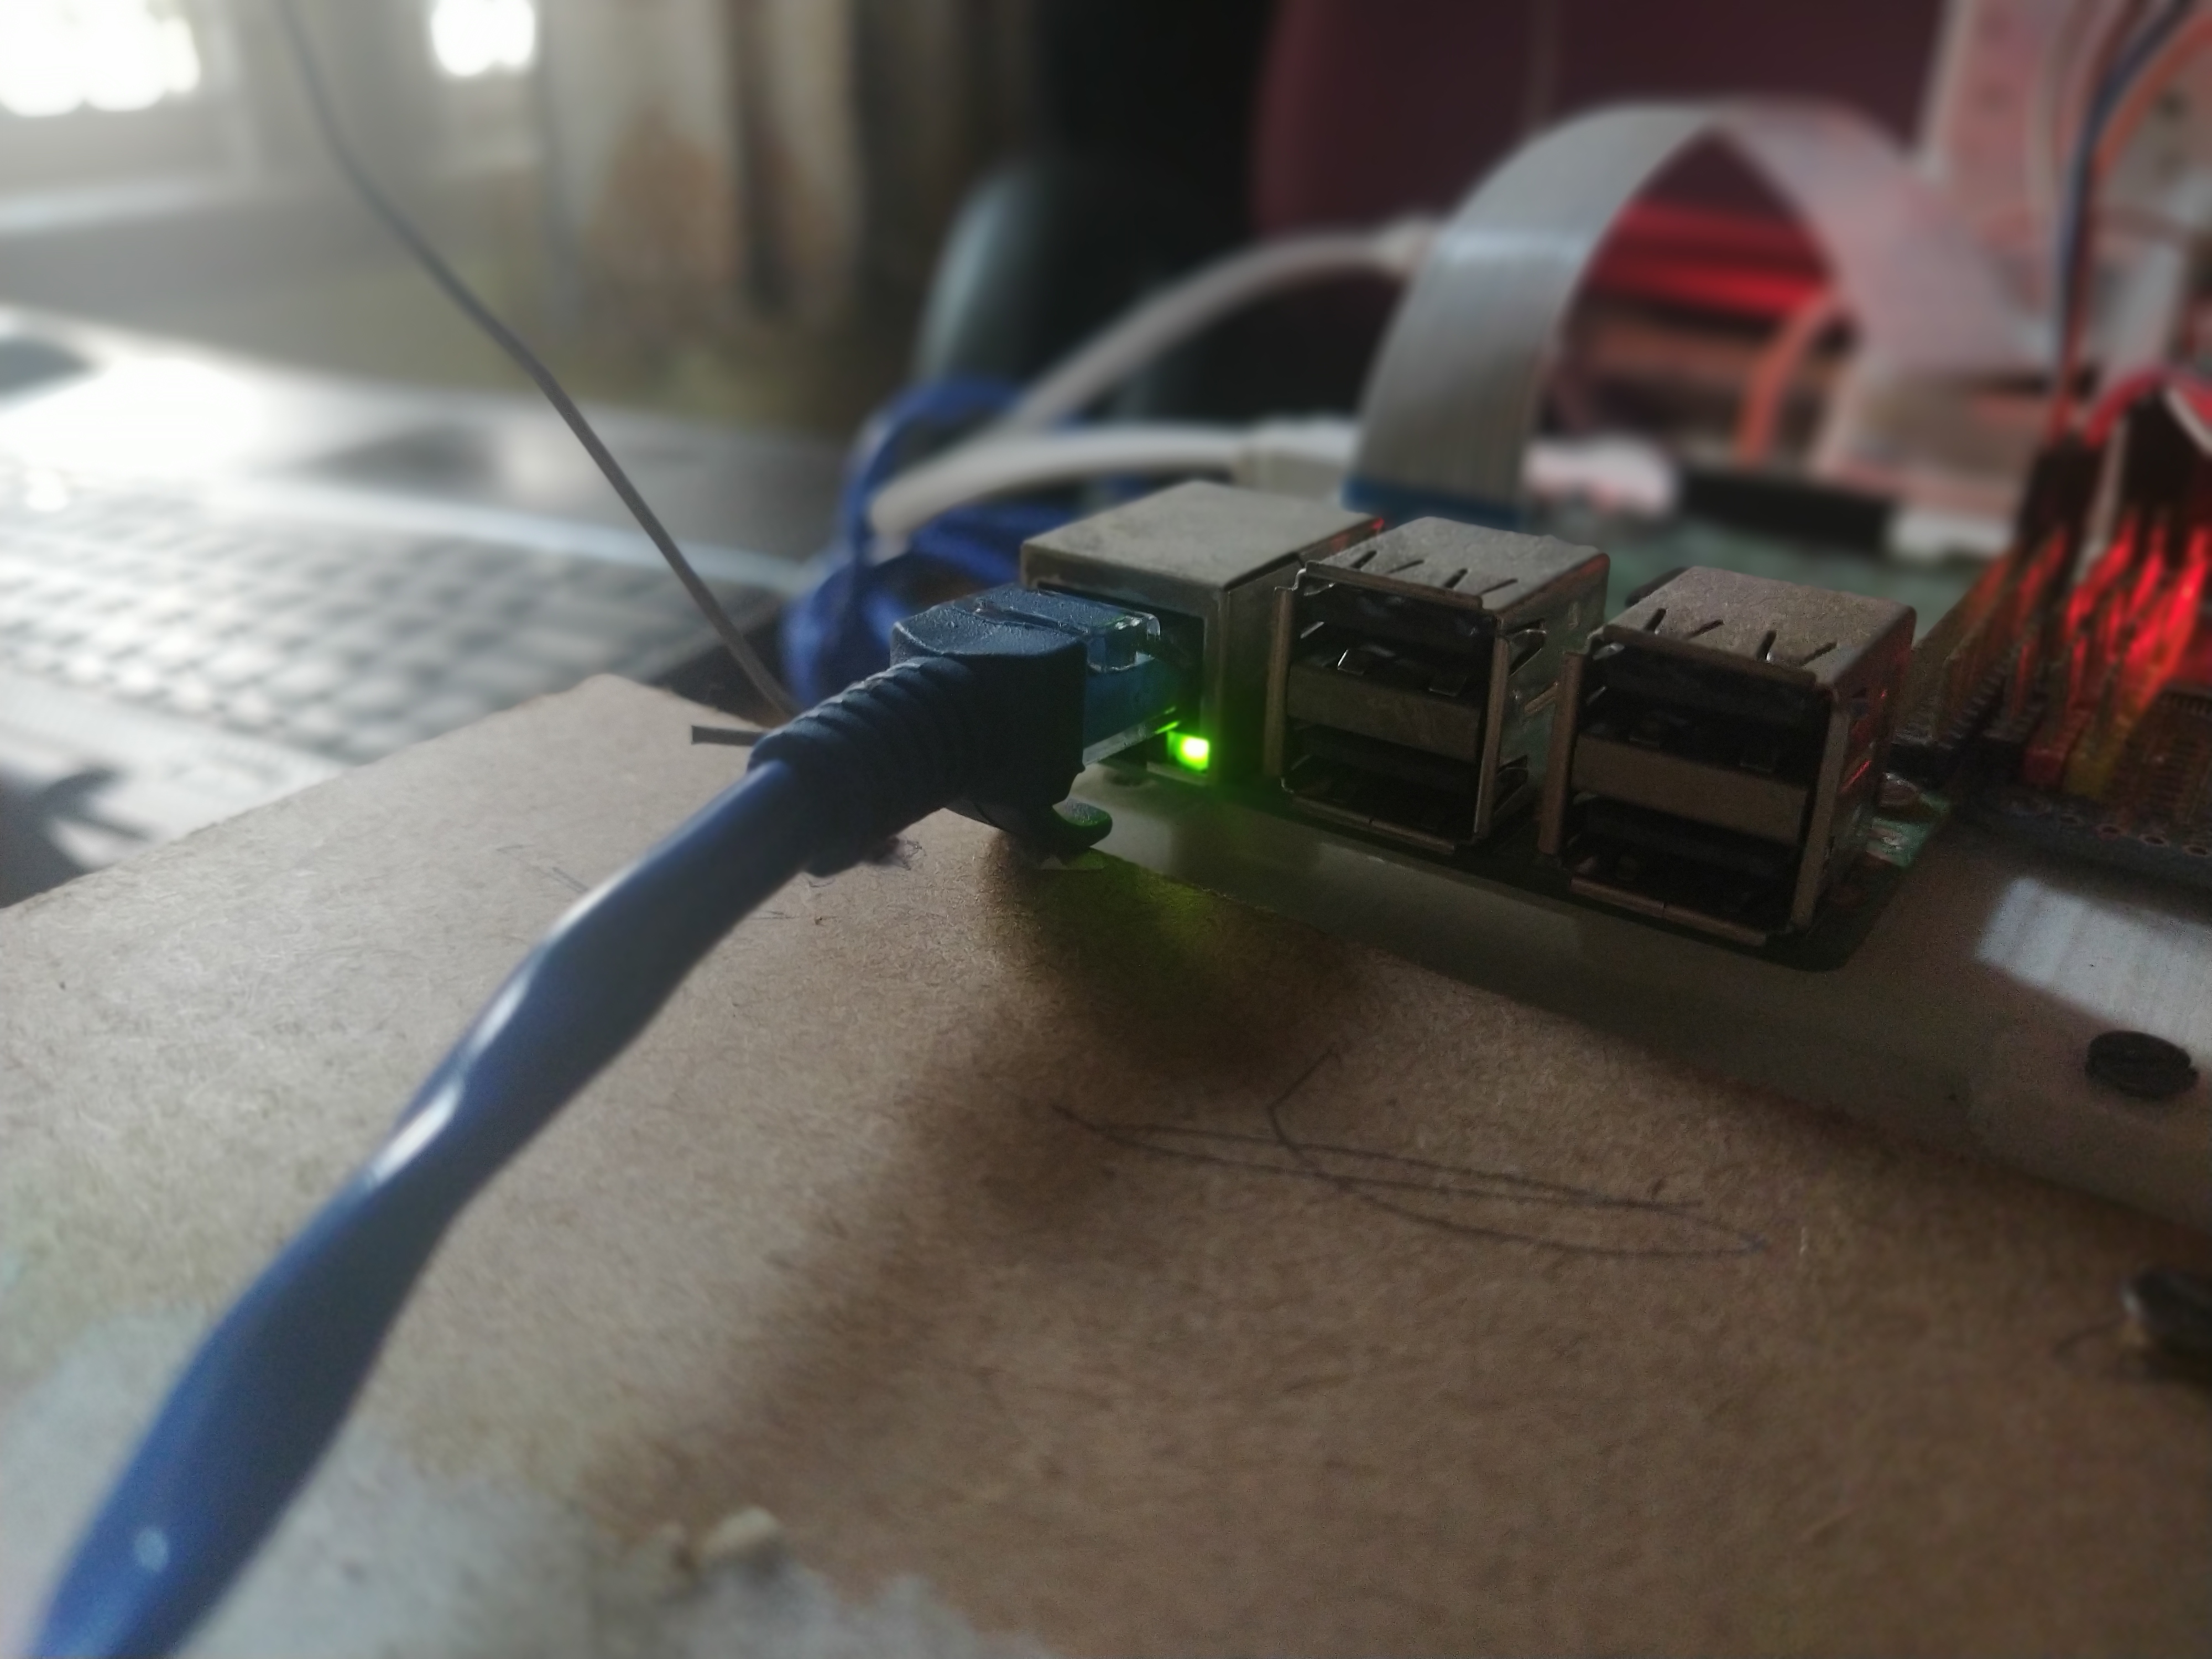
Connecting Ethernet to Rpi:
1. Raspbian OS install on Pi
Step 1: Flash Operating System using Etcher On Windows
- Link To Download Raspbian Buster OS.
- Download Etcher Software for Windows.
- Using an 8GB micro sdcard and with the help of card reader ,raspbian os image(.img) should be flashed into it.
- Get Mobaxterm for SSH coonection Extract the zip and install the exe file.
Step 2: Network Setup
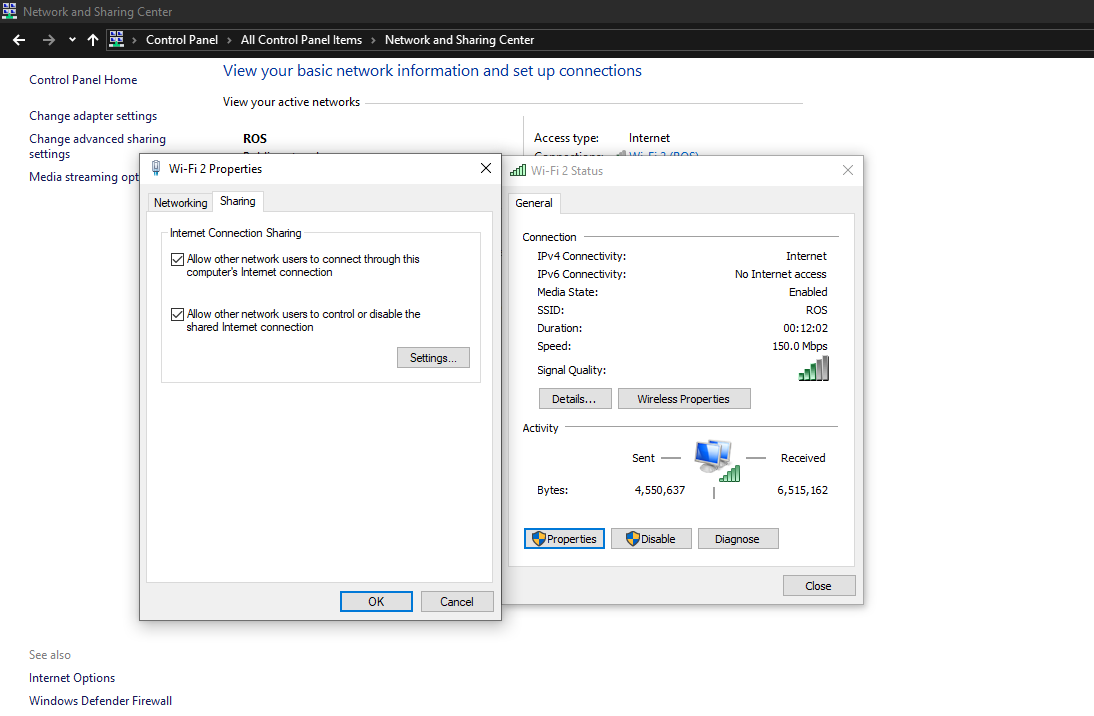
- To enable X-11 forwarding through ethernet we need to assign IP address to Ethernet and enable sharing to which laptop wifi connected to.Go to
(Control Panel) -> (Network Sharing Center) -> (Click on your Wifi network) -> (And tick the two Check Boxes as shown Below)
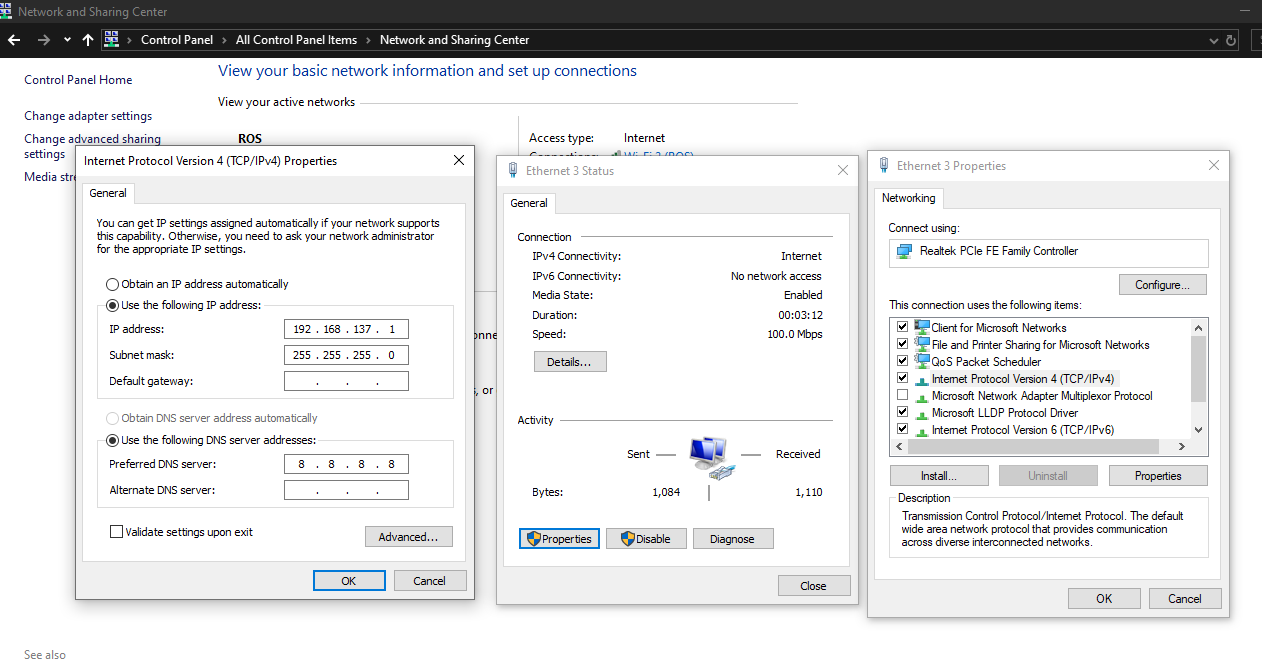
- Assign IP address as shown below
(Control Panel) -> (Network Sharing Center) -> (Click on your Ethernet network) -> (Go to properties) -> (Assign IPV4 address as 192.168.137.1)
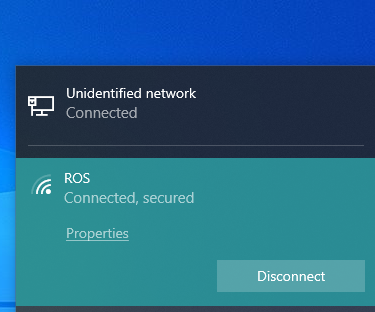
- After Configuring network -> A Connected Text will be shown for Unidentified Network in the Wifi Bar as shown below.
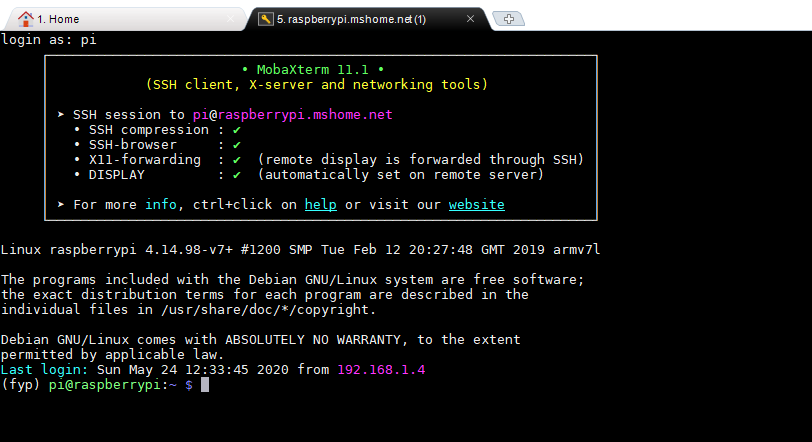
Step 3: MobaXterm Setup
- Open Mabaxterm Desktop shortcut
(Go to Session) -> (Select SSH) -> (Enter Hostname as: -> raspberrypi.mshome.net) -> (Then press ok to start/ double click from left pane to start session which is already created)
login as: pi and Password: raspberry
sudo raspi-config
Enter your pi password if not changed it is raspberry
You will see the screen as shown below
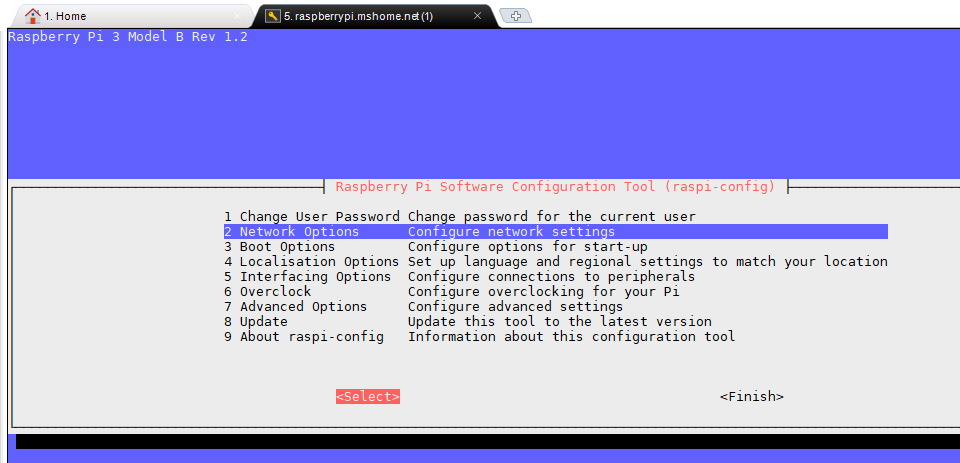
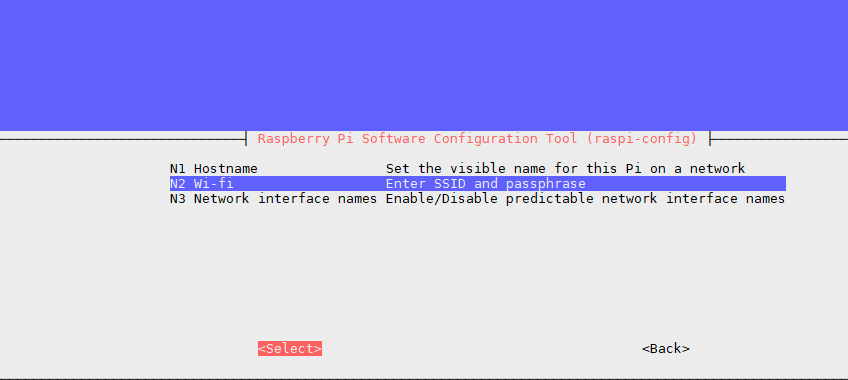
(Select Networking Options) -> (Select Wifi) -> (Enter SSID/Name of wifi) -> (Enter passkey of wifi) -> (then Finish and reboot)
Thats it now you can connect to pi wirelessly without the help of Ethernet cable.
Note
Makesure you dont change the password of wifi once setup is done on PI.
2. Access Rpi using SSH on Ubuntu 16.04
- To Dual boot Ubuntu and Windows
- Open Terminal and Run below command to connect to Rpi-3B ->type yes and Enter the password
ssh -X pi@raspberrypi.local
- -X helps in getting GUI experience(Similar to Ubuntu)
Virual Environment Setup
Step 1 : Update
sudo apt-get update
sudo apt-get upgrade
Step 2 : Raspi-Config
sudo raspi-config
enable interfacing option-I2C
enable interfacing option-Camera
Step 3: Install Dependencies
sudo apt-get install build-essential python3 python3-dev python3-pip python3-virtualenv python3-numpy python3-picamera python3-pandas python3-rpi.gpio i2c-tools avahi-utils joystick libopenjp2-7-dev libtiff5-dev gfortran libatlas-base-dev libopenblas-dev libhdf5-serial-dev git ntp
Step 4: Install Opencv
sudo apt-get install libilmbase-dev libopenexr-dev libgstreamer1.0-dev libjasper-dev libwebp-dev libatlas-base-dev libavcodec-dev libavformat-dev libswscale-dev libqtgui4 libqt4-test
Note
If you need cv2.imshow() to work then build the open cv from source using CMAKE.For this you need to expand File system if 8GB sdcard is used.
Step 5: Finally activate Virtual Env
python3 -m virtualenv -p python3 <env> --system-site-packages
echo "source <env>/bin/activate" >> ~/.bashrc
source ~/.bashrc
Note
In Step 5
Donkeycar Installation
- Get Official Donkey car Github Reporitory and install all dependencies.
Note
You can also refer Donkey car website Official Page for installation.
git clone https://github.com/autorope/donkeycar
cd donkeycar
git checkout master
pip install -e .[pi]
ROS installtion
- No need to install Robot Operating System Software from Official website/from source since we are publishing and subscribing the messages.
- Link- Here is a link that i refered for installing stdmsgs,sensormsgs,cv-bridge,rospy etc required for image transport through grpc prrotocol.
- If you face any probelm with importing libraries then go to this Link simply download any pip wheel. And install it on Pi using the below command.
pip install <location of file downloaded>
- Refer Algorithm section for sending images from Master to slave.
Errors
Error message shows required version of each package to be installed ,just install them to solve your problem.
- For Behaviour Clonning
pip install tensorflow==1.13.1
- For Reinforcement algorithm
pip install tensorflow==1.10.1
- Intall the above version if you are using Behaviour clonning Algorithm.If you plan to use Reinforcement learning algorithm for autonomous driving then install 1.10.1 version.
- Make sure you use same version in Google colab training.By default google colab has higher version installed.So downgrade it.
3. Installations on Ubuntu
Choose between Miniconda and Virtual Environment
- Miniconda
sudo apt-get update
wget https://repo.anaconda.com/miniconda/Miniconda3-latest-Linux-x86_64.sh
bash ./Miniconda3-latest-Linux-x86_64.sh
- Python VirtualEnv
sudo apt-get install python3-virtualenv
- I used Python Virtual env for Reinforcement learning and Conda for Behaviour clonning to keep separate virtual environment to avoid conflicts between libraries.
- To create conda env just change the name as per your requirement in ubuntu.yml file in Donkeycar github clone folder or you can refer to my github repository Link.
- To create python virtual env follow Rpi setup.
Note
While importing cv2 you may get error that is due to open cv package conflict with ROS cv-bridge.
Solution-1-Just run the below command in terminal.
export PYTHONPATH=
Solution-2- paste below code before importing cv2 in python file which is throwing error.
import sys
ros_path = sys.path.append('/usr/lib/python3/dist-packages')
if ros_path in sys.path:
  sys.path.append(ros_path)
Build Packages with Cmake Required for SLAM
sudo apt update -y
sudo apt upgrade -y --no-install-recommends
## basic dependencies
sudo apt install -y build-essential pkg-config cmake git wget curl unzip
## g2o dependencies
sudo apt install -y libatlas-base-dev libsuitesparse-dev
## OpenCV dependencies
sudo apt install -y libgtk-3-dev
sudo apt install -y ffmpeg
sudo apt install -y libavcodec-dev libavformat-dev libavutil-dev libswscale-dev libavresample-dev
## eigen dependencies
sudo apt install -y gfortran
## other dependencies
sudo apt install -y libyaml-cpp-dev libgoogle-glog-dev libgflags-dev

## Pangolin dependencies
sudo apt install -y libglew-dev
Download and install Eigen from source.
cd /path/to/working/dir
wget -q http://bitbucket.org/eigen/eigen/get/3.3.4.tar.bz2
tar xf 3.3.4.tar.bz2
rm -rf 3.3.4.tar.bz2
cd eigen-eigen-5a0156e40feb
mkdir -p build && cd build
cmake \
    -DCMAKE_BUILD_TYPE=Release \
    -DCMAKE_INSTALL_PREFIX=/usr/local \
    ..
make -j4
make install
Download, build and install the custom DBoW2 from source.
cd /path/to/working/dir
git clone https://github.com/shinsumicco/DBoW2.git
cd DBoW2
mkdir build && cd build
cmake \
    -DCMAKE_BUILD_TYPE=Release \
    -DCMAKE_INSTALL_PREFIX=/usr/local \
    ..
make -j4
make install
Download, build and install g2o.
cd /path/to/working/dir
git clone https://github.com/RainerKuemmerle/g2o.git
cd g2o
git checkout 9b41a4ea5ade8e1250b9c1b279f3a9c098811b5a
mkdir build && cd build
cmake \
    -DCMAKE_BUILD_TYPE=Release \
    -DCMAKE_INSTALL_PREFIX=/usr/local \
    -DCMAKE_CXX_FLAGS=-std=c++11 \
    -DBUILD_SHARED_LIBS=ON \
    -DBUILD_UNITTESTS=OFF \
    -DBUILD_WITH_MARCH_NATIVE=ON \
    -DG2O_USE_CHOLMOD=OFF \
    -DG2O_USE_CSPARSE=ON \
    -DG2O_USE_OPENGL=OFF \
    -DG2O_USE_OPENMP=ON \
    ..
make -j4
make install
Download, build and install Pangolin from source.
cd /path/to/working/dir
git clone https://github.com/stevenlovegrove/Pangolin.git
cd Pangolin
git checkout ad8b5f83222291c51b4800d5a5873b0e90a0cf81
mkdir build && cd build
cmake \
    -DCMAKE_BUILD_TYPE=Release \
    -DCMAKE_INSTALL_PREFIX=/usr/local \
    ..
make -j4
make install
Download, build and install OpenCV from source.
cd /path/to/working/dir
wget -q https://github.com/opencv/opencv/archive/3.4.0.zip
unzip -q 3.4.0.zip
rm -rf 3.4.0.zip
cd opencv-3.4.0
mkdir -p build && cd build
cmake \
    -DCMAKE_BUILD_TYPE=Release \
    -DCMAKE_INSTALL_PREFIX=/usr/local \
    -DENABLE_CXX11=ON \
    -DBUILD_DOCS=OFF \
    -DBUILD_EXAMPLES=OFF \
    -DBUILD_JASPER=OFF \
    -DBUILD_OPENEXR=OFF \
    -DBUILD_PERF_TESTS=OFF \
    -DBUILD_TESTS=OFF \
    -DWITH_EIGEN=ON \
    -DWITH_FFMPEG=ON \
    -DWITH_OPENMP=ON \
    ..
make -j4
make install
Build ORB Slam 2 Package for SLAM
- Clone the repository
git clone https://github.com/raulmur/ORB_SLAM2.git ORB_SLAM2
export ROS_PACKAGE_PATH=${ROS_PACKAGE_PATH}:PATH/ORB_SLAM2/Examples/ROS
- Execute below .sh file
chmod +x build_ros.sh
./build_ros.sh
Warning
- You can build packages in catkin_ws as well
- Most of the error is realted to change of CMakeLists.txt file.
- Insert
#include<unistd.h>in all the cpp files wherever you get errors related to usleep library. - Follow this link to resolve issues while running the script